|
Архитектура Аудит Военная наука Иностранные языки Медицина Металлургия Метрология Образование Политология Производство Психология Стандартизация Технологии |
|
|
Архитектура Аудит Военная наука Иностранные языки Медицина Металлургия Метрология Образование Политология Производство Психология Стандартизация Технологии |
Frequent mistakes to avoidСтр 1 из 8Следующая ⇒
Don’t forget to ● Buy Pots, Berries and Animas from the Casino daily. ● Do your normal/hard raids daily, preferably with R/SR characters. ● Do your Co-op missions daily for a Blue Sky Crystal ● Host your main element Magna raids daily (and other elements too if you can afford the AP cost) ● Do the rotating special quest to stock up on every element materials ● Do the rotating showdowns to trade in the shop Summons of each element ● Do your Rupie gacha draws for easy R fodders and plus marks ● Use up your BP to leech Magna raids whenever possible ● Trade your story and event supplies daily in Sierro’s shop for pots and berries ● Try to do event missions whenever they are up for easy crystals/rewards ● Make sure to get all your weekly renown ● Remember to buy your monthly moons with renown ● Do Angel Halo whenever you need EXP Fodder ● Buy the Casino Steel Bricks / Moonstones monthly if you’re not allergic to Poker ● Do your Pinboards Missions to get one guaranteed new SSR unit from a fixed pool
Frequent mistakes to avoid ● Do not reduce or sell SSR Rarity stuff in general (especially gacha) ● Make sure to favorite important weapons so that accidents don’t happen ● Do not use your crystals outside of Legend Festival / Premium Gala ● Do not use moons outside of pots, berries and the occasional CP ● Pick a GW Dagger as your first GW weapon, do not aim for an Eternal (yet) ● Do not spend pots needlessly, store them for an important event ● Do not pick a main element based on the weapons you own ● Do not use SR/SSR gacha weapons as fodder, reduce the SR gacha instead. ● Do not reduce SSR gacha weapons if you’re unsure of their value ● Do not try to get rupees in any other way than going into coop rooms / drawing event gacha ● Do not uncap SR carbuncles with dupes, use a Moonstone instead (see casino) ● Try to not fodder / sell those specific story quest R weapons ● Try to not fodder / reduce the gacha SR weapon Purity Blade (SR Dark Lucius) Before You Start The Gacha System Granblue is first and foremost a Gacha game, where you spend either real money or in-game currency to receive summons and weapons. Characters in Granblue are tied to weapons, so the first time you draw a specific weapon you will also unlock the corresponding character.
The gacha isn’t the only way to get new characters, but it will be your main one, so you’ll have to get the blessing of RNJesus if there’s a particular character you’d like.
There are two Gachas available: ● A “Premium” Gacha where you can get items from R to SSR quality. ● A “Free” Gacha where you can get items from N to R quality.
The free gacha isn’t extremely interesting, so we’ll leave it aside for the moment. The premium gacha can be pulled with either real money, or the in-game equivalent currency called Crystals.
When drawing from the gacha, each item has: ● A 82% chance to be a R item (Blue Crystal) ● A 15% chance to be a SR item (Yellow Crystal) ● A 3% chance to be a SSR item (Rainbow Crystal) Note that some specific items within their rarity category might have an increased draw rate (to the detriment of all others) depending on the various promotions. For example, you can have summon rate up gacha which will make you more likely to draw a summon of any rarity compared to a weapon.
Those items can either be Summons (R to SSR), weapons that unlock characters of the same rarity (R to SSR), or character-less weapons (R to SR). While SSR items are generally the most desirable (especially characters), they are not all equal in usability and sometimes a good SR character will help you more than a bad SSR summon.
There are various events and promotions which will have more advantageous draw rates than the standard ones, but often at the cost of having to use real money (and not in-game currency): ● You can at anytime decide to roll a ten draw once you’ve reached/bought enough currency to do so. This ten roll will guarantee that at least one item among the ten will be of SR rarity or higher (note that this will not give you more chance to get a SSR item). As a result, it’s recommended to always choose ten draws over single draws. A ten draw will cost you around $25 USD depending on the currency exchange rate. ● Star Gacha (nicknamed “Scam gacha”) is a limited-time offer that comes back in various forms around twice every month. It’s a real money only option, and it will guarantee you one SSR in your ten draw at the same price. The SSR you’ll get will be random, although it will be subject to the various rates up. Star Gacha can only be bought once within its promotion period, even though it will generally have multiple rates up. ● Surprise Tickets are one of the best deals proposed in Granblue. It’s a paid only option that will grant you a SSR of your choice (Special Limited characters excluded), plus a regular ten draw ticket that you can keep and use at any time. Surprise tickets (often abbreviated Suptix) allow you to pick characters you need/want without having to be reliant on RNG being kind to you. Its cost is the same $25. ● Premium Gala (also known as Legend Festival or “Legfest”) is a special promotion gacha that appears once every month, for a few days, temporarily doubling the SSR draw rate (from 3% to 6%) and adding limited characters to the draw pool that are not obtainable in other draw periods. It’s the best time to use your currencies to roll and hope for more SSR quality items.
Rerolling Should you reroll? Just like any gacha game, there are some characters in Granblue that are staples to the element you’re playing. While teams can function without them, their addition can turn a ‘decent’ team into a ‘powerful’ one.
Fortunately, Granblue offers the Beginner’s Draw Set (Start Dash) and Surprise Tickets1; these give you a 10-Draw ticket and the choice of 1 SSR. Each of these cost $24.99USD, so if you’re willing to spend a little bit of money rerolling won’t be necessary.
However, if you don’t plan on spending any money, then rerolling2 might be a better option so that you can start with at least one (or a few) core units.
A rerolling guide can be found on the wiki: https://gbf.wiki/Rerolling
The best times to reroll are:
● March Anniversary Event, Daily Free 10 Draws, Free Crystals ● Seasonal/Celebration Events, Daily Free Single Draw, Free Crystals ● Legfest/Premium Gala3, 6% SSR Draw Rates
Another alternative is to purchase an account from players who bulk reroll. However, this is against Cygames’ Terms of Service and your account may be banned.
1 Surprise Tickets occur randomly, but they’re usually six to eight weeks apart.
2 Your first draw is rigged to give you 1 SSR from a selection of starter SSRs. 3 Legfest usually occurs in the last 2 days of a month but has occasionally occurred during the start of the next month as well.
When do I start? If you don’t plan to spend any money, then waiting until a seasonal/celebration event will be a good way of ensuring you start off with a few extra draws. These events usually give players free daily draws and/or crystals. If you are willing to spend money, you have the option of purchasing the Beginner’s Draw Set (aka. Start Dash). Even if you are not, it can be a nice option to leave open should you choose to spend money later down the line. Contrary to what Cygames wants you to believe, this deal doesn’t entirely disappear after 48 hours if you did not buy it immediately. It will reappear every month on the day you joined until you buy it. The Beginner’s Draw Set is a one-time-only deal that allows you to pick a character of your choice from a selection that is locked to whatever was available on your start date. It’s thus advisable for new players to create their account during Premium Gala (aka. Legfest), a campaign where gacha rates for SSRs are doubled, and limited characters that are usually not in the gacha become available. As the deal reappears until you buy it, it is also advised to buy it only when you are certain who you want to pick. Once you buy it, you have a week to pick your character or the ticket disappears. However, the 10 Roll ticket that comes with it is not perishable and can be kept indefinitely.
Where do I start?
● Play in your browser: http://game.granbluefantasy.jp/ It’s the easiest, most efficient method. ● There is the Google App, but Google is discontinuing the service, so it’s best to use the browser link to get used to it. ● There is no international app release (e.g. Shadowverse), only an English translation. There are ways to bypass the region lock. There are lots of general guides available if you search via Google on ‘how to access Japanese apps’. I suggest looking up VPNs or QooApp.
What do I keep? If you decide to reroll in order to give yourself a headstart, you should look out for those specific characters summons that are generally difficult to acquire: Summons Highly sought after and immediately good, especially if you play their respective elements
Not useful for newbies, but godlike summons once you’ve progressed enough
Not useful for newbies, but can become great investments in the future
She improves your drop rates, what more to ask for?
Not as important as the above, but their active calls will be very helpful
The rest of the available Gacha SSR summons aren’t necessarily bad compared to those, but they are probably not worth keeping an account only for them. Characters Non-limited characters For characters, it’s generally a little more complex since there are a lot more of factors to take into account (waifu / husbando preferences, character performances, availability of the character…). Generally, a distinction is made between characters you can get with a Surprise Ticket (Non-Limited), and those you can’t (Limiteds) For non limited characters, I’d recommend to take a look at the characters in this Tier List. You probably won’t understand much of the descriptions in the write-ups, but if a character is highly placed in the tier list there’s a good chance he’ll become a strong characters in your current and future teams. Rigged first free ten roll SSR:
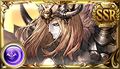
In your tutorial 10-roll you’ll be given one SSR for free out of 6 possible characters. Since it’s extremely easy to reroll until you get one character over another in this ten roll, it’d be a good idea to aim for the better ones, which are those four. If you’d like to aim for one in particular, try to prioritize Charlotta (the water one) since she’s the best starting character. Yodarha (more commonly referred as “Yoda”)
The babysitter of GBF : want to play the game in easy mode until rank 60-70? Literally one shot every single fucking solo boss up until extreme level? Contribute in fights without having a grid? That’s the character for you. Really, if you don’t get to have limited characters among your choices, and you’d like to progress fast, this is the character to aim for. Don’t hesitate to pick him even if you don’t intend to play Water, he can be used in any element team (he will of course have more durability as a character if you do main Water).
Limited characters Zodiac characters
Those characters are exclusive characters featured each year, and that will disappear from gacha for a whole year after their year ended before having a chance of coming back. They aren’t exactly game breaking (although they are very good units), but they are pretty exclusive characters, which makes them more desirable. Zodiacs are only featured during Premium Gala / Legend Festival
Summer characters
Summer characters are generally the better seasonal characters, as they often tend to have great kits (also they are in swimsuits) that can sometimes make them key to unlock all the potential of an element. Especially true for the three above characters, and especially true for the tanned one (Cygames’ biggest mistake to this day). For the other summer characters, you’re recommended to once again take a look at the tier list to determine their worth. They are only available during their corresponding season (summer) and whenever Cygames feel like getting money.
Other seasonal characters Mainly Halloween and Christmas, the two characters above are pretty good, but other non summer seasonal characters generally aren’t as good as swimsuit characters, but again just them being limited characters give them a certain value.
Grand Series characters Those limited characters have two advantages: not only do they all range from Great to Extraordinary in terms of team usability, but the gacha weapon they come with have or will receive an upgrade making them among the strongest late game weapons in the game. Those characters are however less rare than the other mentioned limited, as they are available to pull every month during Legend Festival / Premium Gala. They are still limited though, so impossible to surprise ticket them.
If you don’t have any of the above mentioned SSR, don’t panic! It doesn’t mean your account is trash, the game is completely playable and enjoyable without those units / items. It’s mostly a matter of optimization / competition / min-maxing that a lot of Granblue players tend to enjoy, but that doesn’t mean you have to force yourself to enjoy it as well.
How to Play User Interface (UI) Feel free to skip to the next section since this is merely detailing what each button means.
This is your Homepage. It’ll be your starting point most of the time. If you press Switch, you can change which character (of your current party) will be on screen! Tap them for comments. They make cute ones on holidays like Valentines or Christmas.
The Menu button is the same as the Submenu button.
Have a click around, get a feel of things. Most things match their labels, but here’s the gist of what they mean:
Party Where you’ll mostly be arranging your components for battle. Here you can arrange your characters, weapons, and summons, as well as change your class. You are given 42 free party slots; feel free to mix up your party compositions for different situations. [For more detail on team building]
Upgrade Where you can upgrade the levels of your characters, weapons and summons, as well as uncap them. Uncapping requires duplicate copies of the same item: it’ll boost the maximum stats of that item. There are ways of uncapping when you don’t have another copy, however… [This is the place where you’ll be getting stronger.]
Co-Op While most gameplay is either done in solo or raid battles (i.e. multiple people in one battle), co-op smushes the two concepts together so that 4 people can play together in one room.
Draw Otherwise known as the gacha. This is where you’ll acquire most of your weapons, characters that come along with your weapons, and your summons.
Quest Your entrance to most of the gameplay. [Here’s a more detailed look at what you can play.]
Profile It’s you! This is where you can change your gender, write a profile message, and look at your stats. It’s your public face to the world. You can change what you show publicly via settings.
Journal Lyria’s helping out and keeping a record of everything you’re doing. Read up on flavour text of weapons and characters you’ve met or have, or reread main or event stories.
Crew Players band together here to form one group. Someone else can find you or you can find your own crew/group to settle down with. If you leave a crew, you cannot join another for 24 hours.
Supplies A list of your materials, which are used for crafting and upgrading, and wonders, which are items you can collect via the main story that give you a little boost.
Shop
Crate This is where things go when your inventory is overflowing. Be sure to check the time limit tab! Items in this tab disappear after time’s up. Cygames also sends compensation/apology items here for you to pick up.
Inventory A list of your characters, weapons, summons, and outfits. This is where you can sort and see items or characters you possess in detail. Outfits are merely cosmetic items for your characters; a few are free in-game but most have to be purchased. Note that outfits do not come with their characters. Make sure to use the Sort button at the top right in order to filter your items, it makes life much easier.
Stash If your inventory is overflowing and you need somewhere to store things, this is where they go. Stashes can be purchased from the shop with crystals.
Friends Where you’ll find your friends list, friend requests you’ve sent, and friend requests you have received.
World The world map. Jump to each island through here.
Settings Where you can fiddle around with settings to suit your comfort level. We strongly advise you to go in “Animation/Resolution” settings and set your version settings to Beta to run the game more smoothly on newer devices.
Help Cygames provides its own help book and glossary here. This will always be the most up-to-date and accurate information because it comes from within the game itself.
AP and EP/BP
AP (Action Points) is the equivalent of Stamina in other mobage; it’s the primary resource used to start any kind of quest or raid battle. Your maximum natural amount of AP will increase the more you rank up. You will need AP to start: ● Any main quest past chapter 63 ● Any story side quest (called Free Quest) ● Any skill-unlocking fate episode. ● Any raid that you will host yourself ● Any in-game event (story, collaboration) ● Any coop fight that you will host yourself
You can refill your AP through several ways: ● By leveling up, you will automatically gain your new max amount as additional AP ● By using a half potion, you will regenerate 50 AP or half of your total AP, whichever is the highest value. ● By using a full potion, you will regenerate 100 AP or your whole AP bar, whichever is the highest value. Note that these are also used to revive yourself when you get K.O’ed in fights. ● By using a Twitter Reset, you can refill your whole AP (and EP), to a limit of once per day. ● Naturally over time, you will recover 1 AP every 5 minutes until full.
EP/BP (Encounter points) is a separate resource that will be used whenever you join a multiplayer battle (aka Raids). Unlike AP, EP has a permanent natural limit of 10. It is refilled through: ● Leveling up, you will automatically gain 10 additional BP ● Berries/Seeds, one berry refilling you 1 BP ● Balms, one balm refilling you 5 BP ● Twitter Reset ● Naturally over time, you will recover 1 BP every 10 minutes until full.
Note that both AP and BP can overflow, meaning that you can go over the natural cap. For example, using a twitter reset or leveling up while your AP/BP gauges aren’t empty will make you go over the natural maximum amount. Overflow AP caps at 999, while overflow EP caps at 99.
Also note that Cygames is generally very generous with AP and BP supplies, as they are extremely easy to get through in-game grinding (Shop trade, Casino, Coop), but Cygames also often rewards their players with free potions (Daily login bonus, special events).
As a result, it is actually extremely difficult to run out of Stamina and get time gated in GBF, which explains partially why it feels more like an MMO than a regular mobage.
Crystals Crystals are the substitute currency used for in-game purchases, and what allows Granblue Fantasy to be bearable as a F2P (free-to-play) player. Crystals will allow you to: ● Draw from the premium gacha- 300 crystals for a single draw, 3000 Crystals for a ten draw. Note that crystals cannot be used to buy anything else in the premium gacha (no special gacha like Star Gacha, no daily promotional pull, no Surprise Ticket), but they can be used for Premium Gala / Legend Festival. ● Inventory Slots and Stashes. While you start with a rather comfortable 300 inventory space, getting a few stashes can be a pretty good investment for the future. ● A few special characters (known as Eternals / Guild War characters) will require 2000-3000 Crystals in order to be recruited (but that’s outside the scope of this guide). ● There are other things you can buy with Crystals in Siero’s shop, but you shouldn’t consider them at all as they are a waste of Crystals.
The main ways to acquire Crystals are: ● Finishing a story or event chapter ● Hosting and killing certain raids for the first time ● Hosting and killing any Co-op quest for the first time ● Playing through a character introductory fate episode ● Getting a trophy (= achievement for doing X or Y in game) ● Daily login and special rewards ● Guild Wars betting (more about that later on)
It is heavily recommended to save your Crystals until Legend Festival / Premium Gala happens (at the end of the month), as you will have a higher chance at getting SSR and limited units.
Another possibility is to save your crystals and free draws for a Spark, which consists of drawing 300 times all at once in order to get a guaranteed character of your choice so long as it is featured in the current gacha (this includes limited). However, I heavily recommend against doing this as a completely new player, and would wait until you have at least a few good SSR units for each element. Saving for a spark when most of your in-game Crystals are not farmed yet typically takes around 3-4 months, and around twice the time if you’re out of farmable Crystals from Story, Trophies, Coop...
Party Alright! Time to get into the heart of the gameplay. You’ll mainly be fighting enemies. In order to fight enemies, you’ll need a party to do so. A party is comprised of 3 things:
Your Main Summon will boost your Weapons which will boost your Characters and You.
You play as the Main Character (MC), but you’ll be able to bring 5 characters along with you- 3 in the frontline, and 2 in the backline, who will replace any one in the frontline if they die.
Each character has a Level, HP, Attack, an Element, a Race, a Type, and a Specialty/Proficiency Weapon. What matters mainly at this point for you is the element and the level of your character. The other attributes will come in handy later in the game, but at this point they aren’t extremely important.
You actually start off with 42 party slots. Notice the 6 circular nodes at the bottom, as well as the 7 icons at the top. You can change the icons through the “Change Party Icon” button at the bottom of the party screen.
Characters need to be uncapped with various materials so they can get higher stats and improve their abilities / unlock new abilities.
In order to gain levels, you will have to make your characters participate in battles in your party, which will grant the experience required to level up the character. Weapons Raw Stats: The bulk of your power will come from your weapon grid. Your grid is a roster of weapons located in your party screen; it is comprised of 1 main weapon slot which determines your MC’s element and charge attack (often called a mainhand weapon) and 9 sub-weapon slots that contribute stats and weapon skills to your party’s combined strength.
First of all, every weapon and summon in this game has two stats: Attack and HP
Those stats will be added directly to your characters’ stats and will increase your own damage and HP. The amount of HP and attack they can grant will increase with the weapon/summon level. Feeding any kind of weapon or summon to other weapons will grant them experience that will increase their level. Angel weapons and summons labeled “EXP Boost” are made for this purpose. Battle experience will not increase your weapon or summon levels.
The maximum level a weapon/summon can get to is limited by the number of stars it has. We call this “uncap amount.” In order to raise the level cap, done in the Uncap tab, you’ll need to feed them a copy of the same weapon/summon. Each time you do, it will raise its level cap by one star. We say the weapon/summon is 0*, 1*, 2*, 3* or MLB (Max Limit Break), 4* or FLB (Final Limit Break).
Skills: Most of the weapons in this game also have skills that will provide various buffs to your stats in battle. These buffs come in many forms (boost to HP, attack, multi-attack rate, etc.), but your primary focus will be to work on getting ATK skills in your main element. Many of those skills are also conditional: in most cases they will only affect characters of a certain element, but they can also only affect characters of a certain race, type, or weapon proficiency. Normal skill Omega/Magna skills Unknown skills Unique skills (many variants)
Skills are divided into 4 different categories: Omega/Magna, Normal, Unknown and Unique. You will mix these into your grid in healthy variants based on your summons. It’s important to note a few things regarding skills: ● Normal weapons (as in weapons with normal skills) are both obtainable from the gacha and farmable in game. ● Gacha weapons are exclusively normal type. ● Omega/Magna weapons are exclusively farmable in game, at any time. ● Unknown weapons are nearly exclusively farmable during events (There’s a way to get them even outside of events, but that’s not until you’re at least rank 80).
Most skills have a “level” that can increase once you start to feed those weapons other weapons that have any kind of skill. For each level gained, the strength of the skill will increase by a certain percent (for example, from 5% HP at level 1 to 6% HP at level 2). A weapon’s skill level has a maximum of either 10 or 15 depending on the weapon, although lvl 15 is rarely accessible before you reach High Level (rank 101+). Two other things to note: ● Weapon rarity will influence the strength of the skill, so SSR weapons will have a higher total boost than SR weapons (obviously) ● A weapon that has been skill leveled is harder to further level. For anything regarding skill leveling in general, I’ll recommend reading the wiki page as it gets a bit more technical. As you’ve probably noticed, you can have different categories of skills that will do the same thing. For example, “Magna attack increase” skills and “Normal attack increase” skills both increase your damage in a very similar way; the main difference is that their “multipliers” (i.e the percentage increase they grant to your damage) are multiplicative with each other.
As a result, like Charlotta tells us, it’s more beneficial to our damage to mix different types of skills in our grids. Unfortunately, things aren’t as simple as getting an equal amount of each type of skill in your weapon grid because of summon aura considerations. To be perfectly exact, your damage will also increase depending on your raw attack (increased by the ATK value of your weapons and summons) and your elemental multiplier (more about that later).
Summons
You’ve probably noticed that summons have two components in their descriptions, an active one that will have an effect when called during the battle, and a passive one that will boost your characters for the whole duration of the fight regardless of if the summon has been used or not (we call it an “aura”). It’s important to note that only your “main” (see left screenshot) and “support” (see right screenshot) summons will have their aura be active. While at lower ranks, the damage brought by high level summons will be extremely useful to kill bosses, it will eventually become negligible. The key point is to pick relevant auras that can boost your team. Support and main summon choices must be done according to your team, as the different auras and bonus provided are often conditional (most of the time, you’ll need the characters to be of a certain element / same element as the summon).
It’s important to understand that for any fight you’ll start, you’ll have to pick a support summon from a list of random people, so you won’t be able to constantly use the same set of support summon all the time. That’s when the friend system comes into play, but we’ll get back to this later.
Grids Baby Setups Your early game grid will be one comprised of “stat sticks,” or your weapons with the highest ATK and HP stats. At this point in the game, you most likely will not have a team of one element and you’ll be lacking useful weapons, so you’ll be using gacha weapons you pulled as filler.
If you happen to have a full team of a single element, slotting same element weapons with attack skills will be beneficial to your damage, but if you don’t, simply trying to raise your raw attack stat as much as possible is a valid strategy. As a result, make sure to level your weapons and summons whenever possible to increase your damage.
At this level, when most players won’t be able to form a party with same element characters, one of the go-to summons to pick as a support summon is Grand Order, since it provides a large boost in damage if your party has characters of at least 3 different elements in the front line. If you can’t find her, using summons that will benefit only certain characters in your team is also a valid choice. Don’t forget that you can use the summon call to do a good amount of damage at your level as well, so try to pick up high level summons if possible.
Early-Mid Game Setups From this point onward, you should have mainly mono-elemental teams, which means you’ll have to specialize your grid and pick only weapons that boost the same element, but you’ll also have to choose your summon auras more carefully so that you can start to optimize your damage.
While we won’t go into the details of how to optimize a weapon grid and what each weapon in those grids is, you’ll generally want something that looks like: ● 5-6 Magna/Omega weapons ● 1 Bahamut weapon ● 1-2 Unknown weapon(s) ● 1-2 other normal type weapon(s) (generally celestials, obtained from the Rise of the Beasts event) ● Various main hands with good Charge attack/Ougi effects.
You’ll be starting to slot in weapons that will stay permanently in your grid, and as such you’ll have to consider uncapping and skill leveling those weapons as much as possible.
Despite suggesting an even distribution of weapon multipliers, you’ll notice that my recommended grid includes more Omega/Magna weapons. Why is that? The answer is: Magna/Omega Summons.
As you can see, those summons will increase the efficiency of their respective Magna weapons skills by 100%, tipping the balance in favor of Magna weapons in your grid. Note that you should only consider switching to an Magna summon (main or friend) once you have a sufficient amount of corresponding weapons in your grid and if those weapons are sufficiently skill leveled.
However, much like Charlotta explains to us, that doesn’t mean you should use double Magna as a combination of Main and Support summon. Remember that in the damage formula, there is also an “Elemental Multiplier” number?
This boost means that all your characters that share the said element will get increased damage. This boost end up being multiplicative with the other multiplier, hence why it is important to have it on at least one of your summon aura slots.
Finally, do not confuse auras that give “Boost to X element allies attack” and “Boost to X element attack”. The first one will grant you a Normal type of damage boost, while the second will grant you an Elemental type of damage boost. It’s important to differentiate them since an Elemental boost is generally more valuable since it is not possible to get them through your weapon grid (unlike Normal boosts) Normal Aura Elemental Aura Elements
There are 6 elements in this game: fire, water, wind, earth, light, and dark.
As you can see, they interact with each other, just like your basic rock, paper, scissors triangle. Fire is superior against wind, which is superior against earth, which is superior against water, which is superior against fire. Light and dark are separate from this quartet, and are only superior against each other, and do not have an elemental weakness (if you are dark and attack light, you will have the advantage, and if light attacks you, you will still have the advantage).
Superior elements will have increased damage, while inferior elements will deal weakened damage. Attacking with the superior element also has the advantage of potentially dealing critical hits against the enemy.
I’ll provide an example. WIth a water team, remember that water > fire.
This is water against fire. As fire is weak to water, my damage output is increased. Now, how will the same team fare against its inferior element? Remember that earth > water.
The numbers appear much smaller against earth. My damage output has been weakened because water is the inferior element to earth.
We won’t go into the details of what element you should focus on yet. Just know that what element you’ll start with is highly dependant on what the gacha will give you as SSR characters, and you should wait until you have used some crystals to draw (typically during Premium Gala/Legfest) before committing to an element. It’s still important to note, however, that while Dark and Light do not have an elemental weakness, they are both plagued by much worse drop rates (in addition to no good SR drops usable to increase your damage), which makes progression extremely painful early on. It is estimated to be about two or three times harder to get SSR drops from Light and Dark main raids (Chevalier/Luminiera Magna and Celeste Magna).
Here is a short list of the pros and cons of starting with each element:
Battles
Battle System:
Battles in Granblue fantasy are similar to your typical JRPG settings: they are turn based, with actions divided between auto-attacking, using a character ability, using a summon, and using a healing potion. You can use any number of abilities in a turn as long as they’re available, however you can only use one summon per turn. Auto-attacking will automatically end the turn (and make the enemy take its turn). Healing potions can be used like skills, but their number is limited.
Instead of Mana or MP, all the above actions (except for auto attacking) are gated by cooldowns. The total amount of damage you will be dealing upon attacking an enemy is decided by several factors:
● The character’s innate strength. Unsurprisingly, the higher the character rarity, the more damage they will be able to dish out. Please do note, however, that the difference in rarity is by no means a huge gap, and that character rarity only has a medium influence on your final damage output. This is one of the particularities of Granblue; even SR characters have their uses and can be extremely good placeholders until you get more SSRs. ● Your main summon and friend summon aura: Refer to the sections about summons and grids for more details. Summons’ auras have a high impact on your team’s damage, and the fact that you don’t need to own a summon to benefit from its effect plays a lot in favor of non-spenders. ● Your weapon grid: Even though we kind of glossed over it earlier, your weapon grid is actually what will have the highest impact on your damage. Like in most RPG games, your weapons have stats and skills, and those directly increase the damage of all your characters. Do note that weapon skills only boost damage for one element, which is the main reason why mono-element teams are the norm once you’ve started to progress.
Charge Attack: You might have noticed that under each character’s HP bar, there is a percentage number. It’s what we call a “C.A gauge”, or “Meter gauge.” Normally, an auto attack increases this gauge by 10%, and receiving damage will also increase it. Certain skills can increase or decrease the rate of charge attack gauge gain.
Once this gauge reaches 100%, it means that instead of an auto attack, your character will perform a Charge Attack (also called “Ougi”), which is basically a special move that will deal very high damage, and sometimes have additional effects. Every time a character uses their C.A., all the other characters will receive 10% meter at the end of the attack. Therefore, if your MC and characters’ meters read 100%/90%/80%/70%, each character will perform their charge attack, even though none but the MC has 100% at the start of the turn. This is pretty handy when you want to get several charge attacks going in the same turn. Note that if you do manage to get more than one Ougi / C.A. going in the same turn, you’ll be rewarded by what is called a chain burst: additional damage scaling higher the more characters you got to use their C.A. Skills:
Character skills have 5 different types of effects:
Nukes, basically damage-focused skills. Skills that only deal damage with no effect added tend to have a stronger “multiplier” (= will deal more damage).
Offensive buffs, their aim is to increase the damage of your characters. Those buffs can be team wide, or only self-targeted. Their effects are: - Attack buff: Will apply to any character in the team regardless of their element. - Element buff: Will only increase damage of characters from said element. - Multi-attack buff: Instead of single attacking with their auto attack, characters will be more likely to hit a second and/or third time on the same turn (abbreviated DA and TA : Double Attack and Triple Attack). The amount of meter generated will be higher as well as a result. - Ignition: Fills the meter gauge of the character - C.A. Damage: increases the damage of your C.A. (and sometimes also the damage of the Chain Burst). - Critical: Chance to deal higher damage against enemies when you are the superior element.
Defensive buffs, which aim to make your characters sturdier, sometimes even invincible for the turn. The different effects are: - Defense buff: Reduces the incoming damage, but can’t ever completely negate it. - Damage cut: Negate received damage by a certain percentage, can potentially reach 100%. - Veil: Immunity to debuffs for one turn (more about debuffs in the next section). - Substitute: Enemies attacks will be directed to this character for the turn. - Dodge: All enemy damage will be avoided for the next turn. - Shield: Will absorb a fixed amount of damage until the shield expires or is consumed.
Heals, pretty self-explanatory, they will allow your team to regain HP. - Flat Heal: Will regen your team HP by a flat amount of HP. - Refresh: Will regen your team a certain amount of HP every turn for a certain duration. - Resurrection: Will resurrect a dead ally. - Revitalize: Refresh or Meter gain each turn if target ally is at full HP. - Drain: Gain HP if you deal damage against the enemy. - Clear: Will remove one debuff from your team.
Finally, skills can also inflict debuffs against enemies, but this topic deserves a section of its own. Do note that skills are not restricted to one category- most skills will have several effects at the same time (for example a nuke + a debuff). Buff durations are always counted in turns.
Debuffs: Debuffs are the equivalent of Status effects in any other RPG. Them landing is not guaranteed, and is dependant on your job and added bonus chance to land debuffs your class will offer, and also dependant on the element of the enemy. Chance to land a debuff against an off-element enemy (i.e the enemy is neither weak against your element, is of the same element, or strong against your element) is reduced by 40%, while fighting the same element or the element you are weak to will reduce your chances to land them by 70%.
There are a lot of debuffs in the game, some being unique and exclusive to some characters/bosses, some others being more generic and shared by most characters. We will only go over the most commonly seen debuffs; you can refer to the wiki if you want a more detailed list.
● Stats reduction debuffs are the most commonly seen. The most important ones are Attack down and Defense down. Their use is simple: if you land attack down, incoming damage will be reduced. If you land defense down, your damage will be increased. Stats reduction debuffs have different categories and can stack with each other if chosen right, allowing you to reach up to a 50% stats reduction. Basically, you can reduce incoming damage by 50% at best, and multiply your damage output by two. ● Crowd Control debuffs, the most commonly known being Blind and Charm. Blind creates a chance for the boss to miss their auto attacks. Charm can potentially cause the boss to not act at all during a turn, including a turn when it might perform a special attack. The difference might seem subtle, but it is more important than it seems.
● Damage over time debuffs (aka DoT), most of the time Poison and Burn. Their effect is generally very negligible as they rarely tick for a high amount of damage.
● Tempo debuffs, such as Delay, Gravity, and Break Lock. These debuffs are meant to slow down the occurrence of special attacks from enemies (more about that below).
Debuff effect duration is always counted in seconds. Using a debuff while its effect is still active will simply refresh the duration. Using the same type of debuff that has lower value/efficiency than the one active on the boss will result in a “no effect” message.
● Diamonds: It’s the equivalent to your character meter gauge for the boss. It will fill by one every passing turn, and when it’s full, the boss will unleash a special attack on your team.
● Overdrive bar: It’s a gauge that has three states: Normal, increases into Overdrive, decreases into Break. Depending on the state of this gauge, the behavior of the enemy will change. If Normal is the default starting state, pushing the boss in Overdrive will make it use different types of special attacks once it has full diamonds (and most of the time deadlier ones). When in Break, the enemy will not be able to gain diamonds and won’t use any special attack for a certain amount of time. After break is finished, the enemy will return into normal state. The overdrive gauge increases or decreases depending on the damage the boss receives.
● Triggers: These are scripted boss behaviors (charge attack, full diamonds) that will happen automatically regardless of the state of the boss (even if it’s in break or if it has full diamonds), generally once the boss has reached a certain HP threshold. The majority of debuffs will not prevent triggers either (save for rare debuffs like Paralysis).
Note that enemy triggers can also debuff you similarly to how you are able to debuff them. Those debuffs are sometimes even worse than receiving damage as they can prevent you from attacking for several turns in a row or lower your damage a lot.
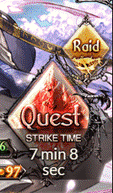
Raids A particularity of GBF is that it actually has real-time multiplayer battles for most of its relevant content. Much like in MMORPGs, those are called “Raids.” Up to 30 players can join those fights and battle together to defeat a boss. Player contribution is judged based on a “Honour” system, which is directly proportional to the amount of damage you deal and the number of buffs/debuffs you cast. The host and the 3 (or sometimes 6) players in the raid with the highest amount of honour will all have more chance to get loot than the others.
Players in a raid aren’t only competing for honour through damage- there is also a cooperation aspect that is crucial the more you progress in the game. The debuff system is shared among the raid, for example, which means that one person debuffing the raid benefits all the other players, allowing for more flexibility in terms of character and class use in a multiplayer battle. Likewise, a good amount of MC buffs are raid buffs, which allows the whole raid to benefit from the effects of a single buff. Coordination and finding people who can complement what you bring in a raid can help a lot when tackling strong boss you can’t deal with alone.
And if you’re not able to kill a boss by yourself, people will gladly come to help you if you share your raid (and sometimes will destroy your raid in the blink of an eye). Remember to tweet your raids as most people join/camp raids through twitter. Main Character Class Most of the time, your MC will be the strongest member of your party and also one of the most flexible. Similarly to most JRPG games, your MC can change class/job according to your preferences and needs. There is a vast array of class to choose from, which allows your MC to fit in any of the common roles you’d want in a party (Buffer, Debuffer, Tank, DPS, Assassin, Healer, etc).
Before HL, you’ll have access to 4 different rows of classes, Row I, Row II, Row III, and the EX Row. For the three first rows, each line of class creates a “category” where all of the classes have the same kind of skillset and where each subsequent row becomes an upgrade of the previous one. For example, Knight (Row I) will upgrade into Sentinel (Row II) which will upgrade into Holy Saber (Row III).
Unlocking a new class will most of the time require: ● A certain amount of CP (class points). You can get CP through leveling up, event gachas, and moon exchange. ● Mastering a combination of classes in the previous row ● Drops and trophies from coop (mainly for ex classes)
It’s important to note that at lower ranks, the amount of CP you can get through leveling is limited, and thus you’ll have to choose which Row 3 job you’ll want to unlock first. Here is a requirement picture taken from the wiki:
Unlocking and mastering Jobs will allow you to get Ex skills that you can use on any other class, which makes MC extremely flexible in what it can do.
Eventually, you’ll want to master all the classes, as they grant your MC permanent bonuses upon mastering them.
Ex classes are generally extremely niche, and not used or rarely used outside of certain situations (like Swordmaster being essentially only used to slime), and their ex skills are not used as much either, but you should eventually unlock them all to get their bonuses.
Dark Fencer is the recommended go to class since it is able to do several things other jobs are unable to do: ● It has a debuff allowing you to reduce damage from enemies while increasing your own damage output. ● It has ways to stall the enemy from using their special attacks, which are often deadly in raids. ● It has innate debuff success bonus which will allow you to land all of the above mentioned more easily even when not fighting as the superior element. ● It’s a dagger class that can wield the Guild War Dagger, one of the best main hand weapon in the game. Battle Rewards
Upon winning a battle, you’ll get certain rewards: ● Chests of various rarities ● Rank points ● Experience Points ● Various currencies (Rupees, Renown)
Chests divide in several categories: ● Wooden chests will generally have normal weapons or low tier materials ● Silver chests will generally have R rarity items or middle tier materials ● Gold chests will generally have SR rarity items or high tier materials ● Flip chests (= gold chests flipping with a rainbow and harp sound at the end of a raid) will generally have SSR rarity items or rare materials. ● Red chests are special chests that only appear in multiplayer battles. One is attributed to the host, while MVP, Vice MVP, and third place in raid contribution are also attributed one (with decreasing chance to get one). Red chests (and particularly host chests) have a much higher chance at dropping rarer items.
Getting various drop buffs (from Treasure Hunt, Journey Drops, and certain summon auras) will increase your chances of getting more reward chests, and thus also increase your chances to get rare items.
Experience and Rank points are two separate things. Rank points will solely influence your Main Character’s rank, while Experience will increase the level of your characters and also serve as “Job Experience Points” meaning that experience will increase your mastery class/job level.
Crew and Strike Time Quite early in the game, you’re asked to join/make your own crew in order to complete the pinboard missions. Joining a crew is probably one of the most “social” aspects of Granblue Fantasy, especially once you start to take an interest to things like Guild Wars, but at our level we will just want to focus on a few things: the Crew Bonuses and Strike Time. When joining a crew, you can get “permanent” bonuses that will help you during battles. The most important ones you want your crew to have are: ● Green pots lvl2: Gives you two green pots at the start of a battle ● Drop rate boost lvl3: Gives you 20% additional drop rate boost ● Charge Bar 30%: You’ll start any battle with 30% meter gauge.
Make sure to join a crew that has at least those three bonus, since they are the best ones. If you are in a crew that doesn’t have those bonus, or that doesn’t constantly refresh them, feel free to leave and look for a better crew, it’s easy to do.
The second thing to consider is Strike Time. Strike Time is a special period that happens twice every day, during which if you join a raid, you will instantly get full gauge meter on your whole party. This is an extremely important time as it allows you to deal high damage with a full chain burst directly on turn 1. It will make your life much easier to farm all the various things you have to do daily, so joining a crew that has convenient Strike Times for you is very important.
Strike Time is always shared in JST, so make sure to do the conversion in your own time zone. Also, Strike Time will only affect multiplayer content (i.e raids), and will not grant you full meter on solo battles.
Finally, note that Strike time will also grant you a 1.2x Bonus Rupies and Exp on every battle fought, which is not of much use at our level, but can end up being useful later on as you become a slime addict.
Friends and Support Summons
At the end of each successful raid, the game will ask you if you’d like to send a friend request to the player you’ve borrowed a summon from. While from time to time, some people will accept your requests regardless of what your own support summons are, it becomes less the case for higher rank players who can’t really afford having friends with junk summons.
A few things to know about the friend system: ● You start with 20 friend slots in your friendlist, which can increase to a maximum of 75 depending on your rank. ● Friend summons will show up in priority and regularly over random players’ summons. ● The frequency of appearance of your friend summons in your support list will depend on how much your friends play Granblue. So it’s not worth it to friend people with great summons but who play only once every month.
In order to maximize your chances at getting your friend requests accepted, here’s what you can do: ● Set up your Support Summons in your profile page. Seriously, no one wants to friend someone who still has a Proto Bahamut in every slot! ● Farm Magna MLB summons of each element, and slot them in your support slots. Having those will increase your chances of people accepting your requests by a lot, especially since Elemental summons owners might want Magna friends. ● Put your better elemental summons as support. As a rule of thumb, if the summon grants 80% or more elemental attack, it will be more valuable than a Magna summon. ● Farming a White Rabbit to put in your Misc tab will also increase a lot your chances of being accepted. You can farm it in the “Sharp Ears” Erune only free quest, Chapter 29/42 in Amalthea Island. ● Send messages / stickers on someone’s wall when friend requesting. It doesn’t seem like much, but people (and especially Japanese players) are pretty receptive to that sort of thing.
Rupies
Rupies are what you could call the “base currency” of GBF. They are used to perform all sort of actions, such as Uncapping characters / weapons / summons, Reducing items, using the rupee draw, buying casino chips… The best way to gather rupees is to play in coop mode and sell the various drops you get there in Sierokarte’s shop (in the “Sell Treasure” tab). Otherwise, event gacha can drop quite a lot of rupies. It is not advised to sell any high rarity items to get rupies as it is a currency very easy to obtain in the game.
Treasure Trade
The treasure trade tab is a bit of a dump where you can exchange various things. It will mainly ask from you item drops from different quests in order to trade them for items or consumables. At our level, it’s important to note that any weapon that is sold in the Quest Items tab is either worthless or not affordable yet. However, feel free to trade your drops for potions and berries, as it is pretty much the only use of those materials.
The Treasure tab should be mainly used to trade for higher tier materials (higher tier orbs, scrolls, higher tier prisms), so that you can get materials to uncap your characters.
The events tab is where you can see the different shops for current or past events/collabs. We’ll get to it later.
Renown Pendants
Collecting these is a guaranteed way to get the magna weapon you want. Normally, the pendant cap (the maximum number of pendants you can earn per week) is at 2000, with an additional 500 if you include R characters in your frontline, and another 500 if you include SR characters in your frontline. If you include these characters, they must survive the battle. The best way to know who will earn you pendants is to see who is in the victory animation at the end. See these two? They’re happy they survived the battle and now I get pendants according to their rarity (R, in this case). Yodarha is a SSR, too high a rarity to award you pendants, and the MC does not count. You can earn up to 3000 pendants per week. If you cap every week, that’s 12000 a month! Omega weapons cost 5000 pendants and are limited to 2 purchases per month per weapon except Luminiera Omega Swords (limited to 7 lifetime purchases). These are the ways to earn them: ● Defeat your 6 Hard island Showdowns every day, because they’re worth 12 pendants each. They’re easily found under the Featured Quests. You’re limited to 3 a day per Showdown. Doing this will earn you 1512 pendants weekly [12 x (6 x 3) x 7]. The remaining 500 should be gained via leeching other people’s raids. Remember to bring your R/SR characters to get that extra 1000 for their survival! ● If a raid battle ends within 3 minutes of your joining, or barring that, and you manage to gain at least 1800 honours, you earn pendants! If not, sorry… ● For the exact amount of how many pendants you can get, use this: https://gbf.wiki/Pendants For extra pendants at the end of the month, you can buy Moons. The gold moon is especially interesting to get as cumulating them can allow you to buy rare items later in the game. An important thing to note is that Renown resets weekly, so make sure you’ve maxed out your pendants before the end of the week! Moons
Moons are mainly obtainable through gacha: you’ll get one moon every time you draw a character you already own. The moon received will correspond to the rarity of the character (R => Bronze, SR => Silver, SSR => Gold).
Bronze and Silver moons are extremely valuable to new players as they are one of the best source of potions and berries in the game. You can trade 5 Bronze moons or 2 Silver Moons for 30 pots or 100 berries. You shouldn’t consider trading your Bronze/Silver moons for anything else other than those at this stage of the game.
Gold moons are rarer, and as a result can be traded for P2W items (they can’t be traded for potions or berries unfortunately). For you beginners, there will be two options: ● Either save your gold moons for later (the good trade options start at 20 gold moons) ● Either trade one or two gold moons for 2500 CP, which will help you a lot to unlock your Row III classes. Either way, try to not waste your moons for anything that isn’t potions, berries, or damascus ingots. Especially since Rupees and Experience books can be tempting, but they would be wasted moons.
Journey Drops Journey Drops are a special currency that allow you to buy special time limited bonus in the shop. Those bonus are mainly QoL / Comfort ones, but are still very valuable to reduce the amount of grinding you’ll have to do.
Journey Drops are acquired through using AP during the day, for every 50 AP used you will receive 1 drop at the end of the day. Accumulating drops throughout the month will increase the next month’s “stage” (Regular, Silver, Gold, Platinum). The better the stage, the stronger the drop buffs will be. You’ll also receive crystals at the end of the month depending on what stage you reach (and even for the luckiest a free 10 draw ticket).
Cerulean Stones
Cerulean Stones are created from Cerulean Sparks, which are obtained every time you draw from the gacha (one draw = one spark). Upon reaching 300 sparks before the gacha period ends, you can trade for a character of your choice (called “Sparking”). But if you can’t reach that amount, your Cerulean Sparks will transform into Cerulean Stones.
Those stones are used mainly to buy materials used for various weapon / character upgrades and uncaps. The rate on the trade is pretty bad for most of the materials, the exception being for Tomes, Scrolls, and Dragon Scales, which have pretty decent exchange rates. There’s not much else to do with Cerulean Stones, so spend them however you feel like it. What to Play
Always Available to Farm: The bulk of the game, and what you will grind mainly.
Time Limited : Those events generally last between 5 and 10 days, and never overlap. They often have rewards you won’t be able to get outside of those events.
Always Available to farm Magnas/Omegas Get used to seeing these faces, because you’ll be seeing them a loooooooooooooooooot.

From left to right: Tiamat Omega, Colossus Omega, Leviathan Omega, Yggdrasil Omega, Luminiera (aka. Chevalier) Omega, Celeste Omega. Depending on your mono-element focus, you will want to fight these raids over and over (don’t worry though, these fights, when open to the public, usually end within minutes). Respectively, they are the wind, fire, water, earth, light, and dark raids. You gain access to them upon reaching Rank 30 and will be seeing them into Rank 101 and beyond. Magnas provide the bulk of your weapon grid. At low level, you can do these things: ● Leeching, the majority of what you’ll be doing as a newbie. Essentially, you’re just there to get the loot. Unfortunately, when you first begin, you will have no working grid and you’ll barely see the HP bar budge when you attack. Luckily, with a 30 man limit to raids and enough high level players about, raids have enough room for you and can still finish even if you can’t personally contribute much. For extra brownie points, bring in useful skills or classes. Bounty Hunter/Treasure Hunt is always appreciated because you’ll be helping everyone's drop rates increase! Make sure to also use a support White Rabbit/Kaguya, and also journey drops! ● Wanpan (one punch), essentially punch and go. Use 1 skill, or just hit the auto attack button once, and you’ve guaranteed you’ll get some loot in that raid when it ends. (If you just enter and stare at the boss, it won’t count as anything and you’ll get nothing…) You can enter up to 3 raids in a row, and have up to 5 pending raids before you’re forced to collect loot. For raids with share chests like Grand Order, you can only do one at a time.
While MVPing will be beyond your reach, take these tips into account: ● Luminiera Omega: When her health is above 50%, do not auto attack! DO NOT attack! Use a skill, any skill! This is because for every new person in the raid, her first attack will be Aegis Merge which will to re-activate her shield – that’s right, she’ll be immune to status effects and 90% of anyone’s damage. It’s incredibly annoying, please do not attack! This can potentially cause the raid to last beyond the minutes it would normally take to finish the fight. ● Celeste Omega: The Celeste Omega fight was recently changed, rather than keeping her old annoying Bizarre Fog triggers, they made it so it triggers only AFTER zombie has been applied. It now skill seals you and zombies the party. Aublade of Oblivion, her overdrive ougi and 50% trigger now applies zombie so be sure to clear it before proceeding to the next turn or else she casts Bizarre Fog. She also heals, blinds, and poisons you at her 25% trigger so be sure to have a Veil or clear for zombie to ensure she doesn’t kill you with the heal or annoy you with the blind.
Where to fight them? ● You can host your own raids! You need to have hosted and defeated their Normal, and then Hard versions first to unlock the Omega showdowns. You will also need to get Anima drops from their Hard raid versions to host them regularly. As a reminder (I recommend to bookmark the fight urls): ◦ Tiamat normal / hard is on Port Breeze Archipelago, Chapter 4 ◦ Colossus normal / hard is on Valtz Duchy, Chapter 8 ◦ Leviathan normal / hard is on Auguste Isles, Chapter 12 ◦ Yggdrasil normal / hard is on Lumacie Archipelago, Chapter ◦ Luminiera normal / hard is Adversa for story reasons, she is on Albion Citadel, Chapter 20 ◦ Celeste normal / hard is on Mist-Shrouded Isle, Chapter 24 ◦ You will then unlock the Omega showdowns of each respective island boss. They will be located on your first island, Zinkenstill. The Tiamat, Colossus Leviathan and Yggdrasil raids are located on the 2nd node, while Luminiera and Celeste are on the 3rd node. ● You can join other people’s raids and leech! You don’t need to have done any other pre-requisites, just reach Rank 30 and you’ll be able to see them in the Raid tab. ● Don’t hesitate to host your raid and let the twitter masses kill it for you, as I said earlier the host chest is really precious and has a high chance of dropping a SSR rarity item!
Tip! I mentioned Yodarha (SSR) above. He’s an absolute blessing for your time because his charge attack hits for 999,999 damage if he has all 3 of his shrouds up. That is the entire HP bar of most island bosses (except Leviathan and Celeste). You are essentially able to one-shot a lot of easy bosses early on and it will shave off lots of farming time for you. If you’re unsure on who to pick if you buy a character ticket, Yodarha is recommended for newbies, just to help your progression curve be smoother. Yoda also exists as a R character, so make sure you pick the SSR one...
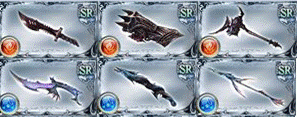
What weapon drops to keep? SR Weapons
These SR Omega weapons with a medium attack skill can be used in baby grids when you don’t have any other attack skill weapons or not enough SSR weapons yet. It can be worth it to fully uncap some of those weapons and skill level them to 2 or 3 until you get to find SSR drops to replace them. Unfortunately, Light and Dark don’t have any SR drops with an attack skill, so their weapons will only serve as fodder. Once you’ve filled your grid with SSR weapons, just use those weapons as regular skill fodder.
SSR Weapons Those are the weapons you’ll want to keep, feel free to use the rest as fodder. Note that Dark and Light drop rates are much lower, with the Dark Claw and Light Sword drop rates being even lower among their respective element weapons.
Placeholder SSR Special SSR Base SSR
● Placeholders: Those weapons have an attack skill, but either it’s only a medium attack skill or either they have a better option to replace them with (generally a weapon with more raw attack). They will still be able to fit in your grid for a very long time until you start to uncap all your weapons, so don’t hesitate to keep them. Note that Yggdrasil sticks are also used in the very, very late game, so avoid reducing them if you can help it.
● Base SSR : Those weapons will constitute the core of your Magna grids, as they are the best choice you’ll have to slot in your grid, unless special circumstances.
● Special SSR : Those weapons are actually better than their Base SSR counterparts, for the simple reason that despite bringing inferior to “Big” attack skills, they also have an additional offensive skill. Both the Tiamat Bolt and the Celeste Claw bring “Enmity”, which increases tremendously your damage the lower your HP. The Chevalier Sword brings both a Normal and Magna multiplier, as well as HP, making it a weapon with higher damage than average, but only once you’ve reached HL.
Main Quest The current Main Quest goes up to Chapter 9X, with 4 new chapters being added every 2 months. As a new player it is recommended to get to Chapter 24 as fast as you can to unlock all the core raids of the game (up to Celeste). If you want to continue going, keep in mind all Main Quests are free up ‘till Chapter 63.
On your path through the Main Quest you’ll quickly get some free Story SR units along the way. These might fill up empty slots in your teams. - SR Katalina (Requirement: Clear Chapter 1): SR Katalina will probably be your most useful SR unit for the early game. She heals, she prevents debuffs, and protects your team. During early game you’ll most likely slot her in most of your teams if you need the sustain. You can uncap her a 4th time after beating Chapter 36.
- SR Rackam (Requirement: Clear Chapter 2): Mostly known for being the most iconic character in the GrandBlues comic, overall a rather weak unit. You can uncap him a 4th time after beating Chapter 28.
- SR Io (Requirement: Clear Chapter 6): She’s a weaker version of Katalina providing heals and clear. You most likely won’t use her though. You can uncap her a 4th time after beating Chapter 42.
- SR Eugen (Requirement: Beat Chapter 10): Eugen is a potent attacker for early Earth teams, being able to tank some single target attacks through his counters and providing decent bursts with his instant charge bars. You can uncap him a 4th time after beating Chapter 32. - SR Rosetta (Requirement: Beat Chapter 14): Rosetta, also nicknamed as JK (for Joshi kōsei = High School girl, a recurring joke in Grand Blues about how she pretends to be forever young) will make for a decent wind unit until you can find better. Her fourth uncap happens after chapter 52. She also has the
- SR Lecia (Requirement: Beat Chapter 44): Needing quite the jump in Chapters, Lecia is a jack of all trades, providing damage repel, dodge rate, team attack up and a simple nuke. Her usefulness may be negligible considering how late she joins in the story. As of today Lecia does not have a 4th uncap.
- SR Cain (Requirements: Beat Chapter 89): Another huge jump in Chapter requirements, Cain is actually a really potent Earth support and attacker. He has an 8-hit nuke, a potent team buff, and a unique self-buff that boosts his attack at the cost of defense.
You may have some characters in your teams that require a certain Chapter from the Main Quest to be passed in order to do their Fate. Rushing through the story can be crucial for some of them (in particular SSR Lecia) and is in most cases recommended. If you get walled off by a boss (a particular mention being Chapter 62-4), feel free to use and abuse the rebound bonus given by the game after being defeated (up to 100% additional HP and attack). If even with the rebound bonus you’re still stuck, don’t be afraid to step back and work on becoming more powerful. Angel Halo
Angel Halo is a special set of quests with the main purpose of providing EXP fodder for weapons and summons to level them. It also drops some useful materials such as whorls, orbs, high orbs, and light-related materials such as scales or scrolls. It also has a chance to drop important items known as Rusted Weapons. These are used for Revenant weapons for elemental changes and for other weapons in the game such as the Bahamut and Ultima weapon series.
It is always accessible through the “Special” tab in the Quest screen. It comes in three difficulties and the amount, along of rarity, of drops goes up with how difficult it is.
Though Angel Halo’s importance grows as a player progresses through content, it goes beyond what the scope of the guide is meant to be covering. For now, it is a good source of experience and EXP fodder to help level your summons and weapons.
Rotating Quests: Elemental Trials and Showdowns There are two rotating sets of quests in Granblue Fantasy that change every two days at reset; the elemental trials and the showdowns. These can be found at the “Special” tab on the quest screen.
The elemental trials are special quests that drop materials related to the element of that said trial. They drop tomes, prisms, orbs, whorls, and dragon scales; all are useful for upgrades and uncapping weapons and characters. Do keep in mind, this is quite difficult for a newcomer to clear but if you can manage it, it will be your best source for element-specific materials. The Water/Earth/Fire/Wind trials also drop a special item known as an elemental fragment. These are used for the Seraphic and Ultima weapon upgrades and forging, but that goes beyond what a newcomer needs to know for now.
The showdowns are a special set of quests that drop animas/items/weapons.The items and animas can be exchanged for items and weapons. The summons, in particular Diablo, are useful as stat sticks with decent to good calls. Don’t hesitate to use those summons as temporary Main Summons for their aura as well if you don’t have any magna weapon yet in your grid. Other Raids
Starting from Rank 50, you’ll be able to join Proto Bahamut and Grand Order raids. You cannot host these two yourself until you reach Rank 80, but joining them – if you can, they’re popular and hard to get into – results in some great drops for you. [However be aware that leeching or not contributing can go wrong because these raids do have a higher chance to fail than Omega showdowns, though the chance of failure is usually quite low. As a newbie, try not to stress about not contributing, but it’s good etiquette to pull your weight a bit more for these raids once you’ve unlocked these harder ones.
Proto Bahamut: You’ll want Horns of Bahamut and Rusted Weapons. These items are necessary to craft various powerful weapons. Bahamut can also be a source of Champion Merits, an item you’ll need a lot. At 25% and 5%, he casts Skyfall, which is a horrible attack designed to absolutely wipe out your characters. Ideally, someone in the raid (or it can be you!) will cast Phalanx II/III to create a 70% damage cut shield for the entire raid. It is up to you to bring the other 30%: this can be your own fully uncapped Onyx Carbuncle (for dark resistance) or other ways as detailed at the bottom of this page: https://gbf.wiki/Proto_Bahamut_(Raid)
Grand Order: you’ll want Azure Feathers, which can be traded 5 per 1 Heavenly Horn (these can also drop themselves). Heavenly Horns can be traded for either Silver Centrums (1 per month) or a Cosmos Weapon of your choice. You can also get Champion Merits. Pay special attention to Blue Sky Crystals, as they are a rare material you can only really farm from doing Co-Op’s daily missions. At 90% and 80%, Grand Order will cast Mirror Image for every person who reaches that HP threshold and attacks. Send out a Lyria OK! sticker to indicate you’ve triggered her Mirror Image and someone will know how to dispel it (using a summon or similar technique). At 50%, make sure you’ve read the above ways to achieve 100% damage cut because she will cast Gamma Ray, which is also designed to wipe your party. After 45% she will change form again and will not cast it, so you will be safe from that particular method of wiping.
Less important raids at our level: ● Tier 1 Raids are Twin Elements, Macula Marius, Medusa, Nezha, Apollo, Dark Angel Olivia. Unfortunately, the weapon drops from these raids would go beyond the expanse of a beginner’s guide. Though they do drop Omega weapons, their drop pool is diluted by their own unique weapons too. Their anima are items you’ll need to host your own Grand Order one day however. ● Tier 2 Raids are Athena, Grani, Baal, Garuda, Odin, Lich. Again, unfortunately beyond the scope of a beginner’s guide. Some of their weapons and all of their animas will however be useful in the future. They are also a great source of Rainbow Prisms since it’s a guaranteed drop in those raids. ● Primarch Raids: They don’t drop anything really interesting outside of damascus grains, silver centrums, and their animas, which can be also found in Ultimate Bahamut raid. ● Huanglong/Qilin: Now that Qilin doesn’t drop crystals anymore, you can safely ignore those until you reach at least level 80. ● Ultimate Bahamut: The most difficult pre-HL (and still one of the most difficult post HL) raid in existence, completely outside of the scope of this guide. ● Griffin, Zarchnal Flame, Imperial Guard, Will-o'-Wisp, Ancient Dragon, Evil Eye are… rather pointless honestly. If you absolutely must squeeze everything out of everything, you can get some useful drops, but you really could spend that AP/BP elsewhere. They should be cleared once for the crystals at least though.
Casino The Jewel Resort Casino opens up once you clear Chapter 8 of the story. You can play Poker/Bingo/Slots from here and win chips. Chips are used to purchase useful items such as ½ AP Potions, Omega Summon Animas, along with a very useful summon called Anat. Casino is also extremely rage inducing What should I play?
The general consensus is that Poker is the most stable way of generating chips in the casino. You will lose a lot, but you will win a lot more so it will still be a profit in the end, especially in comparison to Bingo and Slots. Bingo is a sort of “win big or go home” type of scenario and Slots is chip inefficient versus the other two methods of collecting chips.
You can also trade in rupees for chips if you’re desperate. Casino Cage
The Casino Cage is basically the rewards shop where you can exchange chips for a variety of goods. Goods range from character skins to summons, ½ AP Potions to Omega Animas. Some items in the shop restock at the beginning of each month as well so don’t forget to buy them daily!
Do note that the Jewel Modele is unlocked after collecting 1m in chips from winnings.
The weapons in the Casino Cage are generally reduced since they break down into the same number of resources as weapons obtained from the Premium Draws.
In order to buy out all the items that restock at the end of the month, it takes approximately 11m chips. Most players just buy out Fury Stones/Pebbles/1/2 AP Potions/Soul Berries/Omega Animas, however, at the total of 4.5m a month.
Anat and You
The casino offers a very good summon called Anat. She has very high stats for a free summon and close to the gacha summons obtained through the Premium Draw. Her call is also decent as it provides a high attack buff. She’s also used as a support summon for Wind grids when paired with the main summon, Tiamat Omega.
Now that you know what goodies are in store for you, let’s get to the mini-games that await you.
How to Poker 101
Goal: To get double ups to maximize chip profits.
How does one achieve double up? Anything except “One Pair” will enable you to play Higher or Lower AKA doubling up. You can double your wins every time you win a round at Higher or Lower. The 2 card version will only let you play 10 rounds but that’s enough to make profit.
The idea is to find pairs and pray you get a double up every time a new set of cards is dealt. It may seem mundane but it is profitable at the end.
Do note that the “Joker” counts for any card value, so always pick it if you see it!
Now that you know the first part to Poker, now to explain Higher or Lower to increase chip profit further.
Tips and Tricks
· General rule of thumb is that if it’s 9 and higher, you pick “Low”, 7 or lower is “High” · 8 is a problematic card thus pick either since it can go either way · You can count cards in this as well though it’s not suggested Side Stories
Side stories are old past events that Cygames decided to add permanently to the game, making them accessible and playable at any time. They have an extremely low difficulty, and are clearable even with the weakest grids, all the while being a good source of early crystals.
Their trade shops also have some old summons and weapons that are not always good, but can be interesting to have for new players, although farming them can take a bit of time. Those events are also a good source of free SR event characters, so make sure to read through them!
Co-op
Co-op is a special game mode where you can team up with up to 4 players in order to clear quests of increasing difficulty. It is the main way to get Rupies and Experience, as joining co-op hosted quests will not cost you any resource. Only the host of a quest will have to pay AP to start it.
When entering co-op, you can either decide to join a room (a friend or a random room), or create your own room. When sharing your room into the room board, it is expected of you that you will host the battles. Finally, coop battles have a high chance to drop Elixirs and Half Pots, so don’t hesitate to leech rooms if you’re short in AP supplies!
Daily Missions
Co-op has a system of Daily Missions where you need to clear quests or get certain drops in order to get a Blue Sky Crystal as reward, as well as Co-op Shop points. Each mission completed will grant you one mission point, which are tradeable in the coop shop (by clicking on the “view rewards” button).
You’ll be able to buy a single draw ticket, CP, full elixirs, balms, gold animas, whorls, scales and sr angel experience fodder in this shop. Once the shop is emptied, it will automatically restock, which allows you to cycle through the rewards every 21 days if you never miss your daily missions.
There are 4 types of missions: ● Win 5 co-op quests : This one is a permanent mission that remains the same every day. You can either join or host battles in order to clear it. ● Defeat a certain enemy : Pretty standard, don’t hesitate to join a room if you’re not strong enough to defeat it by yourself. ● Get a certain drop : This one can sometimes take time because of RNG. You can click on the mission to know in which stages the material drops. ● Use a certain item in the room : When in a co-op room, you can find an “Item” tab on the right. Click on the “Treasure” button, and you will be able to trade your co-op materials for various buffs that will grant you bonuses for the duration of the co-op room.
It’s important to note that everyone shares the same daily missions, making it very easy to find rooms or people to clear your own dailies. You can simply click on the “Join Quest” button of the corresponding daily quest you have to clear.
This is one of the best way to accumulate Blue Sky Crystals, and you’ll need a lot of them later on so try to do your daily regularly!
When hosting or joining rooms, you can precise which type of fights you’ll host (if you know moonrunes, you can be more precise), which is useful if you plan to make a room in order to farm a certain type of material and not simply clear your dailies.
In order to unlock Ex Jobs, you’ll have to clear the hardest difficulty of co-op (called Pandemonium), which is outside of the scope of this guide, but at least you know it’s there.
Time Limited Events
Story Events
Story events are events in which your crew interacts with inhabitants of the Granblue’s world, often featuring a Gacha character as its main protagonist. The stories are pretty nice and will make you care for the characters, so take the time to read them! In events, you will gather that event’s treasure items to call forth a boss battle. Treasure items are unique to events. Remember: if you are not at a power level to comfortably farm the event, aim for the essentials and focus on something else. Generally you will want to try and grab: ● Free quest crystals. You read a story (or skip it) and collect them in your crate at the end. Usually they cost 0 AP. ● Free boss crystals. Fight bosses as you can. If it’s a raid boss, someone else will usually come in and fight it with you. ● The loyalty character. Place them in your party and bring them with you to quests. They will gain loyalty according to the AP you spent. At the end you get both a free character and 50 crystals from their fate episode. There are variations on gaining loyalty characters, please refer to that event page if they’re unique. ● Damascus crystals. Obtained through honours at 1, then 2, then 3 million thresholds. It is unlikely as a new player you will get as far as 3 million honours. These are endgame items that can be traded in for a Damascus Bar, a rare item that can uncap a weapon without possessing a duplicate copy of it. Do what you can to collect them during events. ● Weapons/Summons. These vary in importance, but unknown weapons (weapons with EX skills) are the most important, because they are unique to event periods and thus only farmable for its duration or until the event repeats (usually months away). With the weapon grid in mind, event weapons with normal skills and summons can be placeholders, but note they often lose out when you get your magna weapons. Consult the wiki or use your best judgement.
Now to collect all that loot, you have 3 options: ● Tokens: These allow you to draw in the token box of that event, 2 per draw. You gain them at the end of your battle alongside honours. The number you get will vary depending on the difficulty, whether you hosted or merely joined another person’s raid, or if you were the MVP. The token box is random, so when you get your loot depends entirely on your luck. ● Badges: These are item drops you earn at the end of the battle. The higher the difficulty, the more badges that will drop. You mainly want to aim for gold badges. The bronze badges’ rewards can be safely ignored. These are simple click and collect prizes on the event page. ● Honours: Along with tokens, you earn honours in proportion to how you contributed in the raid. As contribution is marked by your damage dealt or assistance provided: at an early level, try and bring buffs or debuffs instead because your power level will be too low to outdo higher level players. Essentially, you earn more honours the more you do in the raid, so eventually you will solo the raid for the maximum amount. Nearing the event’s end, you will get access to the event’s daily missions. Make sure to complete them for easy Crystals. Trophies are also easy sources of Crystals, usually requiring you to defeat a boss an x amount of times. Do not stress about reaching 200 kills, it’s a pretty high number. Other requirements include just clearing the story event boss. Defeating the nightmare version will probably be out of your power range. Look forward to being stronger if/when the event repeats!
Story Reruns Reruns (also called Redux) are past events which are featured again in a new format that is more geared toward solo play. Unlike Story events, you will not depend on material drops to host your battles, as they will simply cost AP. The counterpart is that the bulk of those battles will has to be fought solo, meaning you won’t be able to get help from other people.
Instead of getting tokens so that you can draw in the event gacha, the battles will drop material that you will have to trade in the event shop for weapons, potions, damascus Crystals, summons, etc… Raids still exist in this format, but they are mainly here to drop a certain type of material over the others so that there isn’t an unbalance in dropped materials.
If you can, try to always grab at least the Damascus Crystals from the shop.
Collaboration Events
Essentially the same format as Story Reruns, except GBF does a crossover story with other games. These events are not guaranteed to repeat like story events. Added to that is that their weapons are generally of the unknown skill type, which are unique to events.
Unlike story events however, Collabs tend to have good or great free characters, and the unknown weapons you can get in them also tend to be stronger than average, so try to grab what you can! Unite and Fight
(Aka Guild Wars/GW). This is the competitive PvP event of the game where your crew competes with other crews for points. Contrary to the name, you can do this event solo. It is ideal to join a crew anyway (if not just for the crew benefits). You’ll learn to hate this event as well soon enough, don’t worry. Similarly to Story events, battling raids will reward you with tokens that you’ll have to use in order to get rewards from a special event gacha.
The event is comprised of two parts: the preliminaries, which decide which crews move onto the finals, and the actual finals where those crews are pitted against one another. If your crew does not pass preliminaries, your crew is locked out of finals, but you are still able to fight raids. Unlike other events, there are down periods where all battles are inaccessible to allow players to actually sleep. Don’t freak out if you haven’t gotten all your loot, take note of the actual end date and whether or not it’s the last Final. Battles will resume, just wait a few hours. There are several battle difficulties, but at our level we won’t consider fighting anything over the Ex+ difficulty. You want two things:
Revenant Weapons are accessible through the event gacha, and can be quite frustrating to get since you will always need at least 4 copies (to get a MLB weapon) from it for the weapon to be worth. It is advised to get the GW Dagger first, for its powerful charge attack that will increase your double and triple attack rate. Note that you can change the element of your GW weapons to what suits you the best. Later on you’ll be able to consider starting the process to recruit the associated Eternal with their Revenant Weapon (e.g. fully upgrading the sword will allow you to recruit Seofon) – be aware it’s a long path of farming and a difficult battle to recruit them at the end of it all.
Valour Badges. This is where it gets difficult if you’re solo or in a casual crew. Valour badges are gained through qualifying into the finals and winning rounds in a “Who can farm most” battle against another random crew. At your level, it’s not likely you’ll compete seriously in GW yet, so we won’t go into details, but know that trading valor is the only way to get Sunlight Stones, which are used to uncap SSR Summons.
During the finals, you can bet, because this game loves gambling. You can earn betting cards through visiting the event page daily, and earning a certain amount of honours alongside your crew earning a certain amount honours (there’s a mistranslation on the game page, it’s AND, not OR!) and then visiting the betting page. Betting closes at 7pm JST, and you don’t get anything out of betting earlier as bet payouts are locked to what they are at closing time and not whenever you placed your bet. Bet just before closing time to ensure you won’t have wasted a ticket.
Know that betting is often subject to what you’d call “rigging”, and despite all the charts and stats done by various people each GW to try to predict the outcome, results sometimes end up “Yakuza’d” which allow a small portion of the players to benefit from unbelievably high crystals outcome because they themselves tipped the balance purposely for it to happen. So betting on an unlikely outcome isn’t a completely stupid strategy (even without rigging, bet results are always subject to RNG as well).
Rise of the Beasts
Rise of the Beasts (abbreviated RotB) is a special event during which you need to battle rotating raids and score honors in order to gain a special Pendants currency. Raids have two main difficulties: Ex and Ex+, and hosting / joining Ex repeatedly is necessary to unlock an Ex+ difficulty raid.
During this event, the whole day is split in periods of two hours that will grant you Cardinal Bonus. For two hours, each element boss will get a 1.5x increase of received pendants. The elements rotate every two hours and for the whole day (you can generally find the exact schedule in game)
Note that you can only host the Ex+ difficulty raid of the corresponding cardinal hour element (it’ll switch automatically after two hours as well). Because of the nature of RotB, it’s difficult for newer players to perform well without burning intensively their BP resources, since the amount of pendants they will earn is proportional to the amount of damage they can contribute to the raid. Getting a small group of people to help you through Ex+ raids can help greatly (that’s when a crew can come in handy) especially since pubbing Ex+ often ends up in the boss getting obliterated instantly.
However, you should try to get by all costs the daily gold nugget given as a daily reward. To accomplish this, you will simply have to join or host each of the Extreme raids 5 times. In the advent you’d manage to get enough gold nuggets to trade for a gold bar, DO NOT USE THE BAR ON A WEAPON. I can’t stress this enough, you’ll regret it bitterly if you were to not listen to me. Yes, I know, the in game guide recommends you to use gold bars on weapons, but it’s a trap.
Special Showdowns and Xeno Clashes
Those events drop some of the best F2P weapons in the game, but are unfortunately out of the scope of this guide. For Xeno Clashes, you are heavily suggested to leech event raids as much as possible until you’re able to buy at least one 0* shop copy of the weapon.
Those events also tend to have very, very low drop rates...
Special Campaigns Who doesn’t like special events for milestones or important holidays? Granblue Fantasy is no exception! There are a variety of special campaigns that they like to throw on as a celebration.
Magnafest
Also referred as “Magna Festival” or magfest for short. Raid costs are halved and the amount of EP is halved to enter raids as well; the only exceptions to this are the The Dark Sunrise and Dusk of Nightfall raids since they are special cases. Normal and Hard raids are also free during this period as well; use this opportunity to get as much done as possible! Magnafest also comes with its own issues...
All the quests in the “Special” tab only cost half of the AP usually required. Players particularly like to farm Angel Halo during this time since it only costs 10 AP to run the highest difficulty, along with the Elemental Trials since it’s much less ½ AP Potion intensive if it was to be farmed during regular times. It’s the best time to finally level those weapons and summons.
All Co-op quests are half off as well! This is the best time to finish up the majority of the Co-op quests that are available as well. People typically “slimeblast” during this period of time but that is not something a newcomer should worry over and should instead look into once they are able to. It’s the fastest way to gain ranks/EMP/level your characters.
These three are most most common campaigns that Granblue typically holds when a celebration is happening. There are other types of campaigns as well but are typically uncommon such as double Journey Drop effects, daily free Premium Draws/10 Part Draws, and ½ Free Quest.
Seasonal events
Summer, Halloween, Christmas, Valentine's, April fools… Very often those periods get to have some special events tied to them. The bigger events will get Magnafest, free gacha draws (or even free 10 draws), daily crystals, and special themed story events, while others will get special characters interactions or special short duration events. Even if you don’t intend to play GBF regularly, try to at least login during those times! Those periods also often have special gacha with seasonal limited characters! FAQ Sempoi, what is reducing? Reducing refers to breaking down weapons and summons into components such as whorls, elemental quartz, orbs, and weapon stones. Quartz and weapon stones are used for content around mid-late game and for final upgrades to weapons and summons. For now, it is expensive for a newcomer to reduce so don’t worry! In doubt, avoid reducing an SSR item without asking more experienced players beforehand, you might regret it later down the road.
Sempoi, what is a whale? Whales are people who have a lot of incomes to spend on the gacha, allowing them to have more chances to get rare summons, sparking limited characters with real money, and using P2W gold moon weapons in their grids. They are, as a result, significantly stronger than your average player, although there is no content in granblue that will ever require you to whale in order to beat it.
Useful links The Unofficial English Granblue Fantasy Wiki. Please, bookmark it and use it, it is one of the best and most up to date english resource for everything that concerns Granblue. While we’ve mostly glossed over the different concepts and mechanics of the game, if you’d like to get some deeper knowledge about the various topics we’ve talked about in this guide you should be using the wiki first and foremost.
Official Twitter. You can’t get news any more recent than here!
The Ultimate Guide: Outdated but still very useful.
GBF-Gaijins : Updated translated GBF news from Granblue Radio to Live Streams!
The GBF Gaijin Tier List : comprehensive overview of SSR/notable SR GBF characters.
Japanese GBF Wiki :detailed information on character skills can be found here.
GBF Gamewith site : similar to JP GBF Wiki but with character reviews and data.
Comics / Manga Gran’s miserable life 4-koma: https://imgur.com/a/wvGPM
Granblue School ☆ Springtime of life (Doujin - SFW) http://www.mangahere.co/manga/granblue_fantasy_dj_shiritsu_grablu_jogakuen/c001/
This is Granblue Fantasy! (In game comic strips teaching the basics of the game) http://game.granbluefantasy.jp/#beginnercomic
Grand Blues (In game comics meant to be comical and provide some additional game lore) http://game.granbluefantasy.jp/#comic/1
Various GBF Communities Granblue Subreddit Reddit Discord Radiance Discord GBFI Discord English Wiki Discord Afterword I hope you’ve all found this guide instructive or useful! I can’t guarantee that we’ll be able to update this guide in a timely fashion in the future, so it might get outdated after some time, we’ll try our best to incorporate important new things in this guide though!
While it might look like a huge information dump, know that with this guide we’ve barely scratched the surface regarding GBF and its mechanics. No need to panic though, with all what I’ve presented to you, you should be able to progress safely through all of the early game. Once you become more experienced, you’ll start to have more specific questions about the game, and I encourage you to join any GBF community where more experienced players will be able to guide you and answer you.
Finally, a big thanks to Chiffy and Psychicfire who wrote a consequent amount of pages on this guide, and a big thanks to all the people who contributed to the guide in one way or another!
And to you, young Skyfarer who came across this guide, have fun playing Granblue! This is only the beginning… Don’t forget to ● Buy Pots, Berries and Animas from the Casino daily. ● Do your normal/hard raids daily, preferably with R/SR characters. ● Do your Co-op missions daily for a Blue Sky Crystal ● Host your main element Magna raids daily (and other elements too if you can afford the AP cost) ● Do the rotating special quest to stock up on every element materials ● Do the rotating showdowns to trade in the shop Summons of each element ● Do your Rupie gacha draws for easy R fodders and plus marks ● Use up your BP to leech Magna raids whenever possible ● Trade your story and event supplies daily in Sierro’s shop for pots and berries ● Try to do event missions whenever they are up for easy crystals/rewards ● Make sure to get all your weekly renown ● Remember to buy your monthly moons with renown ● Do Angel Halo whenever you need EXP Fodder ● Buy the Casino Steel Bricks / Moonstones monthly if you’re not allergic to Poker ● Do your Pinboards Missions to get one guaranteed new SSR unit from a fixed pool
Frequent mistakes to avoid ● Do not reduce or sell SSR Rarity stuff in general (especially gacha) ● Make sure to favorite important weapons so that accidents don’t happen ● Do not use your crystals outside of Legend Festival / Premium Gala ● Do not use moons outside of pots, berries and the occasional CP ● Pick a GW Dagger as your first GW weapon, do not aim for an Eternal (yet) ● Do not spend pots needlessly, store them for an important event ● Do not pick a main element based on the weapons you own ● Do not use SR/SSR gacha weapons as fodder, reduce the SR gacha instead. ● Do not reduce SSR gacha weapons if you’re unsure of their value ● Do not try to get rupees in any other way than going into coop rooms / drawing event gacha ● Do not uncap SR carbuncles with dupes, use a Moonstone instead (see casino) ● Try to not fodder / sell those specific story quest R weapons ● Try to not fodder / reduce the gacha SR weapon Purity Blade (SR Dark Lucius) Before You Start The Gacha System Granblue is first and foremost a Gacha game, where you spend either real money or in-game currency to receive summons and weapons. Characters in Granblue are tied to weapons, so the first time you draw a specific weapon you will also unlock the corresponding character.
The gacha isn’t the only way to get new characters, but it will be your main one, so you’ll have to get the blessing of RNJesus if there’s a particular character you’d like.
There are two Gachas available: ● A “Premium” Gacha where you can get items from R to SSR quality. ● A “Free” Gacha where you can get items from N to R quality.
The free gacha isn’t extremely interesting, so we’ll leave it aside for the moment. The premium gacha can be pulled with either real money, or the in-game equivalent currency called Crystals.
When drawing from the gacha, each item has: ● A 82% chance to be a R item (Blue Crystal) ● A 15% chance to be a SR item (Yellow Crystal) ● A 3% chance to be a SSR item (Rainbow Crystal) Note that some specific items within their rarity category might have an increased draw rate (to the detriment of all others) depending on the various promotions. For example, you can have summon rate up gacha which will make you more likely to draw a summon of any rarity compared to a weapon.
Those items can either be Summons (R to SSR), weapons that unlock characters of the same rarity (R to SSR), or character-less weapons (R to SR). While SSR items are generally the most desirable (especially characters), they are not all equal in usability and sometimes a good SR character will help you more than a bad SSR summon.
There are various events and promotions which will have more advantageous draw rates than the standard ones, but often at the cost of having to use real money (and not in-game currency): ● You can at anytime decide to roll a ten draw once you’ve reached/bought enough currency to do so. This ten roll will guarantee that at least one item among the ten will be of SR rarity or higher (note that this will not give you more chance to get a SSR item). As a result, it’s recommended to always choose ten draws over single draws. A ten draw will cost you around $25 USD depending on the currency exchange rate. ● Star Gacha (nicknamed “Scam gacha”) is a limited-time offer that comes back in various forms around twice every month. It’s a real money only option, and it will guarantee you one SSR in your ten draw at the same price. The SSR you’ll get will be random, although it will be subject to the various rates up. Star Gacha can only be bought once within its promotion period, even though it will generally have multiple rates up. ● Surprise Tickets are one of the best deals proposed in Granblue. It’s a paid only option that will grant you a SSR of your choice (Special Limited characters excluded), plus a regular ten draw ticket that you can keep and use at any time. Surprise tickets (often abbreviated Suptix) allow you to pick characters you need/want without having to be reliant on RNG being kind to you. Its cost is the same $25. ● Premium Gala (also known as Legend Festival or “Legfest”) is a special promotion gacha that appears once every month, for a few days, temporarily doubling the SSR draw rate (from 3% to 6%) and adding limited characters to the draw pool that are not obtainable in other draw periods. It’s the best time to use your currencies to roll and hope for more SSR quality items.
Rerolling Should you reroll? Just like any gacha game, there are some characters in Granblue that are staples to the element you’re playing. While teams can function without them, their addition can turn a ‘decent’ team into a ‘powerful’ one.
Fortunately, Granblue offers the Beginner’s Draw Set (Start Dash) and Surprise Tickets1; these give you a 10-Draw ticket and the choice of 1 SSR. Each of these cost $24.99USD, so if you’re willing to spend a little bit of money rerolling won’t be necessary.
However, if you don’t plan on spending any money, then rerolling2 might be a better option so that you can start with at least one (or a few) core units.
A rerolling guide can be found on the wiki: https://gbf.wiki/Rerolling
The best times to reroll are:
● March Anniversary Event, Daily Free 10 Draws, Free Crystals ● Seasonal/Celebration Events, Daily Free Single Draw, Free Crystals ● Legfest/Premium Gala3, 6% SSR Draw Rates
Another alternative is to purchase an account from players who bulk reroll. However, this is against Cygames’ Terms of Service and your account may be banned.
1 Surprise Tickets occur randomly, but they’re usually six to eight weeks apart.
2 Your first draw is rigged to give you 1 SSR from a selection of starter SSRs. 3 Legfest usually occurs in the last 2 days of a month but has occasionally occurred during the start of the next month as well.
When do I start? If you don’t plan to spend any money, then waiting until a seasonal/celebration event will be a good way of ensuring you start off with a few extra draws. These events usually give players free daily draws and/or crystals. If you are willing to spend money, you have the option of purchasing the Beginner’s Draw Set (aka. Start Dash). Even if you are not, it can be a nice option to leave open should you choose to spend money later down the line. Contrary to what Cygames wants you to believe, this deal doesn’t entirely disappear after 48 hours if you did not buy it immediately. It will reappear every month on the day you joined until you buy it. The Beginner’s Draw Set is a one-time-only deal that allows you to pick a character of your choice from a selection that is locked to whatever was available on your start date. It’s thus advisable for new players to create their account during Premium Gala (aka. Legfest), a campaign where gacha rates for SSRs are doubled, and limited characters that are usually not in the gacha become available. As the deal reappears until you buy it, it is also advised to buy it only when you are certain who you want to pick. Once you buy it, you have a week to pick your character or the ticket disappears. However, the 10 Roll ticket that comes with it is not perishable and can be kept indefinitely.
Where do I start?
● Play in your browser: http://game.granbluefantasy.jp/ It’s the easiest, most efficient method. ● There is the Google App, but Google is discontinuing the service, so it’s best to use the browser link to get used to it. ● There is no international app release (e.g. Shadowverse), only an English translation. There are ways to bypass the region lock. There are lots of general guides available if you search via Google on ‘how to access Japanese apps’. I suggest looking up VPNs or QooApp.
What do I keep? If you decide to reroll in order to give yourself a headstart, you should look out for those specific characters summons that are generally difficult to acquire: Summons Highly sought after and immediately good, especially if you play their respective elements
Not useful for newbies, but godlike summons once you’ve progressed enough
Not useful for newbies, but can become great investments in the future
She improves your drop rates, what more to ask for?
Not as important as the above, but their active calls will be very helpful
The rest of the available Gacha SSR summons aren’t necessarily bad compared to those, but they are probably not worth keeping an account only for them. Characters Non-limited characters For characters, it’s generally a little more complex since there are a lot more of factors to take into account (waifu / husbando preferences, character performances, availability of the character…). Generally, a distinction is made between characters you can get with a Surprise Ticket (Non-Limited), and those you can’t (Limiteds) For non limited characters, I’d recommend to take a look at the characters in this Tier List. You probably won’t understand much of the descriptions in the write-ups, but if a character is highly placed in the tier list there’s a good chance he’ll become a strong characters in your current and future teams. Rigged first free ten roll SSR:
In your tutorial 10-roll you’ll be given one SSR for free out of 6 possible characters. Since it’s extremely easy to reroll until you get one character over another in this ten roll, it’d be a good idea to aim for the better ones, which are those four. If you’d like to aim for one in particular, try to prioritize Charlotta (the water one) since she’s the best starting character. Yodarha (more commonly referred as “Yoda”)
The babysitter of GBF : want to play the game in easy mode until rank 60-70? Literally one shot every single fucking solo boss up until extreme level? Contribute in fights without having a grid? That’s the character for you. Really, if you don’t get to have limited characters among your choices, and you’d like to progress fast, this is the character to aim for. Don’t hesitate to pick him even if you don’t intend to play Water, he can be used in any element team (he will of course have more durability as a character if you do main Water).
Limited characters Zodiac characters
Those characters are exclusive characters featured each year, and that will disappear from gacha for a whole year after their year ended before having a chance of coming back. They aren’t exactly game breaking (although they are very good units), but they are pretty exclusive characters, which makes them more desirable. Zodiacs are only featured during Premium Gala / Legend Festival
Summer characters
Summer characters are generally the better seasonal characters, as they often tend to have great kits (also they are in swimsuits) that can sometimes make them key to unlock all the potential of an element. Especially true for the three above characters, and especially true for the tanned one (Cygames’ biggest mistake to this day). For the other summer characters, you’re recommended to once again take a look at the tier list to determine their worth. They are only available during their corresponding season (summer) and whenever Cygames feel like getting money.
|
Последнее изменение этой страницы: 2019-06-09; Просмотров: 593; Нарушение авторского права страницы