|
Архитектура Аудит Военная наука Иностранные языки Медицина Металлургия Метрология Образование Политология Производство Психология Стандартизация Технологии |
|
|
Архитектура Аудит Военная наука Иностранные языки Медицина Металлургия Метрология Образование Политология Производство Психология Стандартизация Технологии |
D Baby Blocks 4x4 5x5 6x6 7x7 instructionsСтр 1 из 4Следующая ⇒
D Baby Blocks 4x4 5x5 6x6 7x7 instructions FABRIC REQUIREMENTS
X4 (100mm x 100mm) hoop
For all blocks Fabric A - 16cm x 16cm (6”x 6”) Fabric B - 10cm x 10cm (4”x 4”) background
Bird Block Fabric C - 9cm x 10cm (3”x 4”) bird’s body Small piece of fabric for the applique – birds wing Bunny Block Fabric C - 10cm x 10cm (4”x 4”) bunny’s face Cloud Block Fabric C - 6cm x 10cm (2.5”x 4”) cloud Flower Block Fabric C - 6cm x 6cm (2.5”x 2.5”) flower Small piece of fabric for the applique – 2 leaves Koala Block Fabric C - 9cm x 10cm (3.5”x 4”) koala Small piece of fabric for the applique – nose Stegosaurus Block Fabric C - 9cm x 10cm (3.5”x 4”) stegosaurus Batting 1 – 16cm x 16cm (6”x 6”) for each block
· Assortment of different bits of ribbon · Crinkly material to add a fun noise or bells · You’ll need 6 blocks to make a block
X5 (130mm x 130mm) hoop
For all blocks Fabric A - 18cm x 18cm (7”x 7”) Fabric B - 12cm x 12cm (4.5”x 4.5”) background
Bird Block Fabric C - 10cm x 12cm (4”x 4.5”) bird’s body Small piece of fabric for the applique – birds wing Bunny Block Fabric C - 12cm x 12cm (4.5”x 4.5”) bunny’s face Cloud Block Fabric C - 8cm x 13cm (3”x 5”) cloud Flower Block Fabric C - 8cm x 8cm (3”x 3”) flower Small piece of fabric for the applique – 2 leaves Koala Block Fabric C - 12cm x 13cm (4.5”x 5”) koala Small piece of fabric for the applique – nose Stegosaurus Block Fabric C - 12cm x 13cm (4.5”x 5”) stegosaurus Batting 1 – 18cm x 18cm (7”x 7”) for each block · Assortment of different bits of ribbon · Crinkly material to add a fun noise or bells · You’ll need 6 blocks to make a block
X6 (160mm x 160mm) hoop
For all blocks Fabric A - 20cm x 20cm (8”x 8”) Fabric B - 14cm x 14cm (5.5”x 5.5”) background
Bird Block Fabric C - 13cm x 15cm (5”x 5.5”) bird’s body Small piece of fabric for the applique – birds wing Bunny Block Fabric C - 15cm x 15cm (5.5”x 5.5”) bunny’s face Cloud Block Fabric C - 9cm x 15cm (3.5”x 5.5”) cloud Flower Block Fabric C - 9cm x 9cm (3.5”x 3.5”) flower Small piece of fabric for the applique – 2 leaves Koala Block Fabric C - 14cm x 16cm (5.5”x 6”) koala Small piece of fabric for the applique – nose Stegosaurus Block Fabric C - 15cm x 16cm (5.5”x 6”) stegosaurus Batting 1 – 20cm x 20cm (8”x 8”) for each block · Assortment of different bits of ribbon · Crinkly material to add a fun noise or bells · You’ll need 6 blocks to make a block X7 (180mm x 180mm) hoop
For all blocks Fabric A - 23cm x 23cm (9”x 9”) Fabric B - 16cm x 16cm (6”x 6”) background
Bird Block Fabric C - 15cm x 16cm (5.5”x 6”) bird’s body Small piece of fabric for the applique – birds wing Bunny Block Fabric C - 16cm x 16cm (6”x 6”) bunny’s face Cloud Block Fabric C - 11cm x 18cm (4.5”x 7”) cloud Flower Block Fabric C - 11cm x 11cm (4.5”x 4.5”) flower Small piece of fabric for the applique – 2 leaves Koala Block Fabric C - 17cm x 18cm (6.5”x 7”) koala Small piece of fabric for the applique – nose
Stegosaurus Block Fabric C - 17cm x 18cm (6.5”x 7”) stegosaurus Batting 1 – 23cm x 23cm (9”x 9”) for each block · Assortment of different bits of ribbon · Crinkly material to add a fun noise or bells · You’ll need 6 blocks to make a block
Finished dimensions (approx.) 4x4 - 10cmL x 10cmW x 10cmD (4” x 4” x 4”) 5x5 - 13cmL x 13cmW x 13cmD (5” x 5” x 5”) 6x6 - 16cmL x 16cmW x 16cmD (6” x 6” x 6”) 7x7 - 18cmL x 18cmW x 18cmD (7” x 7” x 7”)
MAKE THE BLOCKS
(Repeat steps 1-5 for each block)
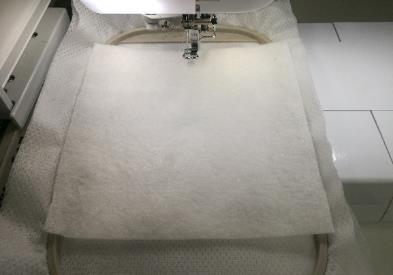
Hoop tearaway or soft mesh stabiliser in the hoop depending on which size you are sewing. The first step, which is sewing the batting down and trimming it, is optional. It is so no batting is in the seam, making the blocks easier to join. If you prefer the batting in the seam just skip STEP 1 and proceed straight to STEP 2.
Place batting 1 on top of the hoop.
STEP 1 Stitch the batting down.
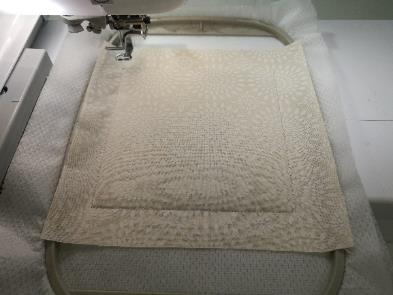
Remove the hoop from your machine and trim the batting about 1-2mm from the stitching.
STEP 2 Place Fabric A on top of the hoop right side up covering the batting. Stitch down.
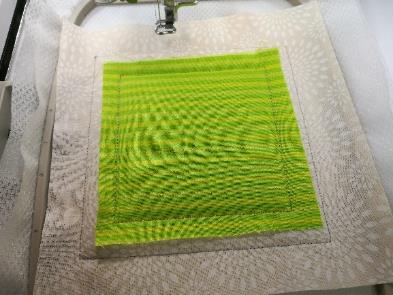
STEP 3 Stitch the placement line for Fabric B.
STEP 4 Place Fabric B on the top of the hoop right side up covering the placement line and stitch down.
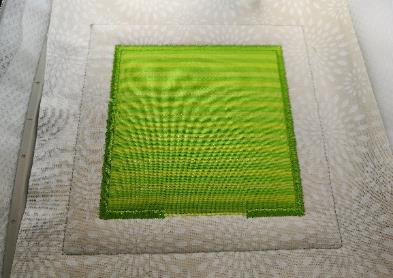
Remove the hoop from your machine and trim the fabric about 1-2mm from the stitching.
STEP 5 Embroider the satin stitch around Fabric B.
JOINING THE BLOCKS
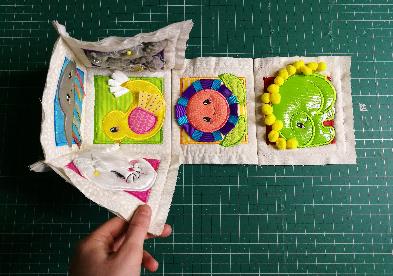
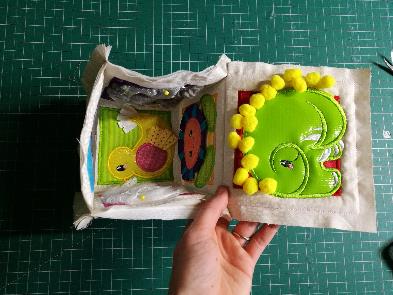
Lay out your blocks on a flat surface and decide the order of your blocks. The following diagram is how the blocks should be laid out, so they’ll create a cube. Pay special attention to the direction the blocks are facing.
  First join blocks 2 and 3 right sides together. If any ribbon is in the seams, just tape it back out of the way. Pin and stitch the side seam on your sewing machine. Stitch just inside the border already stitched on the blocks so the stitching will not be seen on the right side later. Leave 5/8” (1.58cm) unsewn at the start and end. (Make sure you really backstitch at the start and end so the stitching doesn’t come undone when turning out the right way later on).
 

Repeat the same process with joined 3 and 4, 4 and 5. You should have a row of 4 blocks joined together. Again, remembering to leave 5/8” (1.58cm) unsewn at the start and end. (Make sure you really backstitch at the start and end so the stitching doesn’t come undone when turning out the right way later on). Iron the seams open.
Join 1 and 6 to 3 (see diagram) stitching just inside the border already stitched on the blocks. Leave about 5/8” (1.58cm) on each side of 1 and 6. (Make sure you really backstitch at the start and end so the stitching doesn’t come undone when turning out the right way later on). Iron the seams open.
Now we’ll sew the sides together to form a cube.
First join one side of block 6 with one side of block 2 (see diagram). Place right sides together and pin and stitch the seam on your sewing machine still starting the stitching at 5/8” as before. Stitch just inside the border already stitched on the blocks so the stitching will not be seen on the right side later. (Make sure you really backstitch at the start and end so the stitching doesn’t come undone when turning out the right way later on).

Then join the opposite side of block 2 with one side of block 1 (see diagram). Place right sides together and Pin and stitch the seam on your sewing machine still starting the stitching at 5/8” as before.. Stitch just inside the border already stitched on the blocks so the stitching will not be seen on the right side later. (Make sure you really backstitch at the start and end so the stitching doesn’t come undone when turning out the right way later on).

Join the other side of block 6 to one side of block 4 and the other side of block 1 onto block 4. You should see your block forming, with lid. (Make sure you really backstitch at the start and end so the stitching doesn’t come undone when turning out the right way later on).

Sew the 2 of the 3 remaining sides together. (Still starting & ending the stitching at 5/8” as before). Leave one side open so you can stuff your block. (Make sure you really backstitch at the start and end so the stitching doesn’t come undone when turning out the right way later on).
Turn your block right-side out through the opening. Use a chopstick to help push out the corners. (You may find that some of the stitching from the side seams next to the opening may come undone; don’t worry, this can simply be hand sewn when we hand sew the opening closed).
Stuff your block. You can also add some crinkly material, bells or squeaky toy.
Tuck the remaining sides together and pin. Hands stitch the opening closed.
Your cute little block is finished.
D Baby Blocks 4x4 5x5 6x6 7x7 instructions FABRIC REQUIREMENTS
X4 (100mm x 100mm) hoop
For all blocks Fabric A - 16cm x 16cm (6”x 6”) Fabric B - 10cm x 10cm (4”x 4”) background
Bird Block Fabric C - 9cm x 10cm (3”x 4”) bird’s body |
Последнее изменение этой страницы: 2019-03-21; Просмотров: 300; Нарушение авторского права страницы